A photo's shape is something you fix by cropping after the shot. If that is how you shoot, the final shape stays undecided until the editing stage.
Encadra reverses that order. Before the shutter, you set the saved area with a frame, and only what is inside the frame is saved, exactly as seen. The crop happens before you shoot, not after. This article maps the whole approach, from the five standard ratios to what Pro adds.
What happens when you crop after the shot
When you crop later, the screen you shot with and the final photo do not share a shape. Trimming the photo to a destination's ratio can bring the subject's edges closer than you expected, or cut into space you meant to keep as margin.
If you shoot the subject smaller to leave room for that trim, you end up discarding resolution from the photo itself. Not every scene can be reshot, so deferring the shape decision makes the photo pay for it.
Deciding first moves that judgment in front of the shutter. You press it with the finished shape already in view, and the cropping step itself disappears.
What it means to set the frame first
There are only three actions: pick a ratio, check the saved area in the frame, and shoot as is. With a ratio picked, the camera screen looks like this.
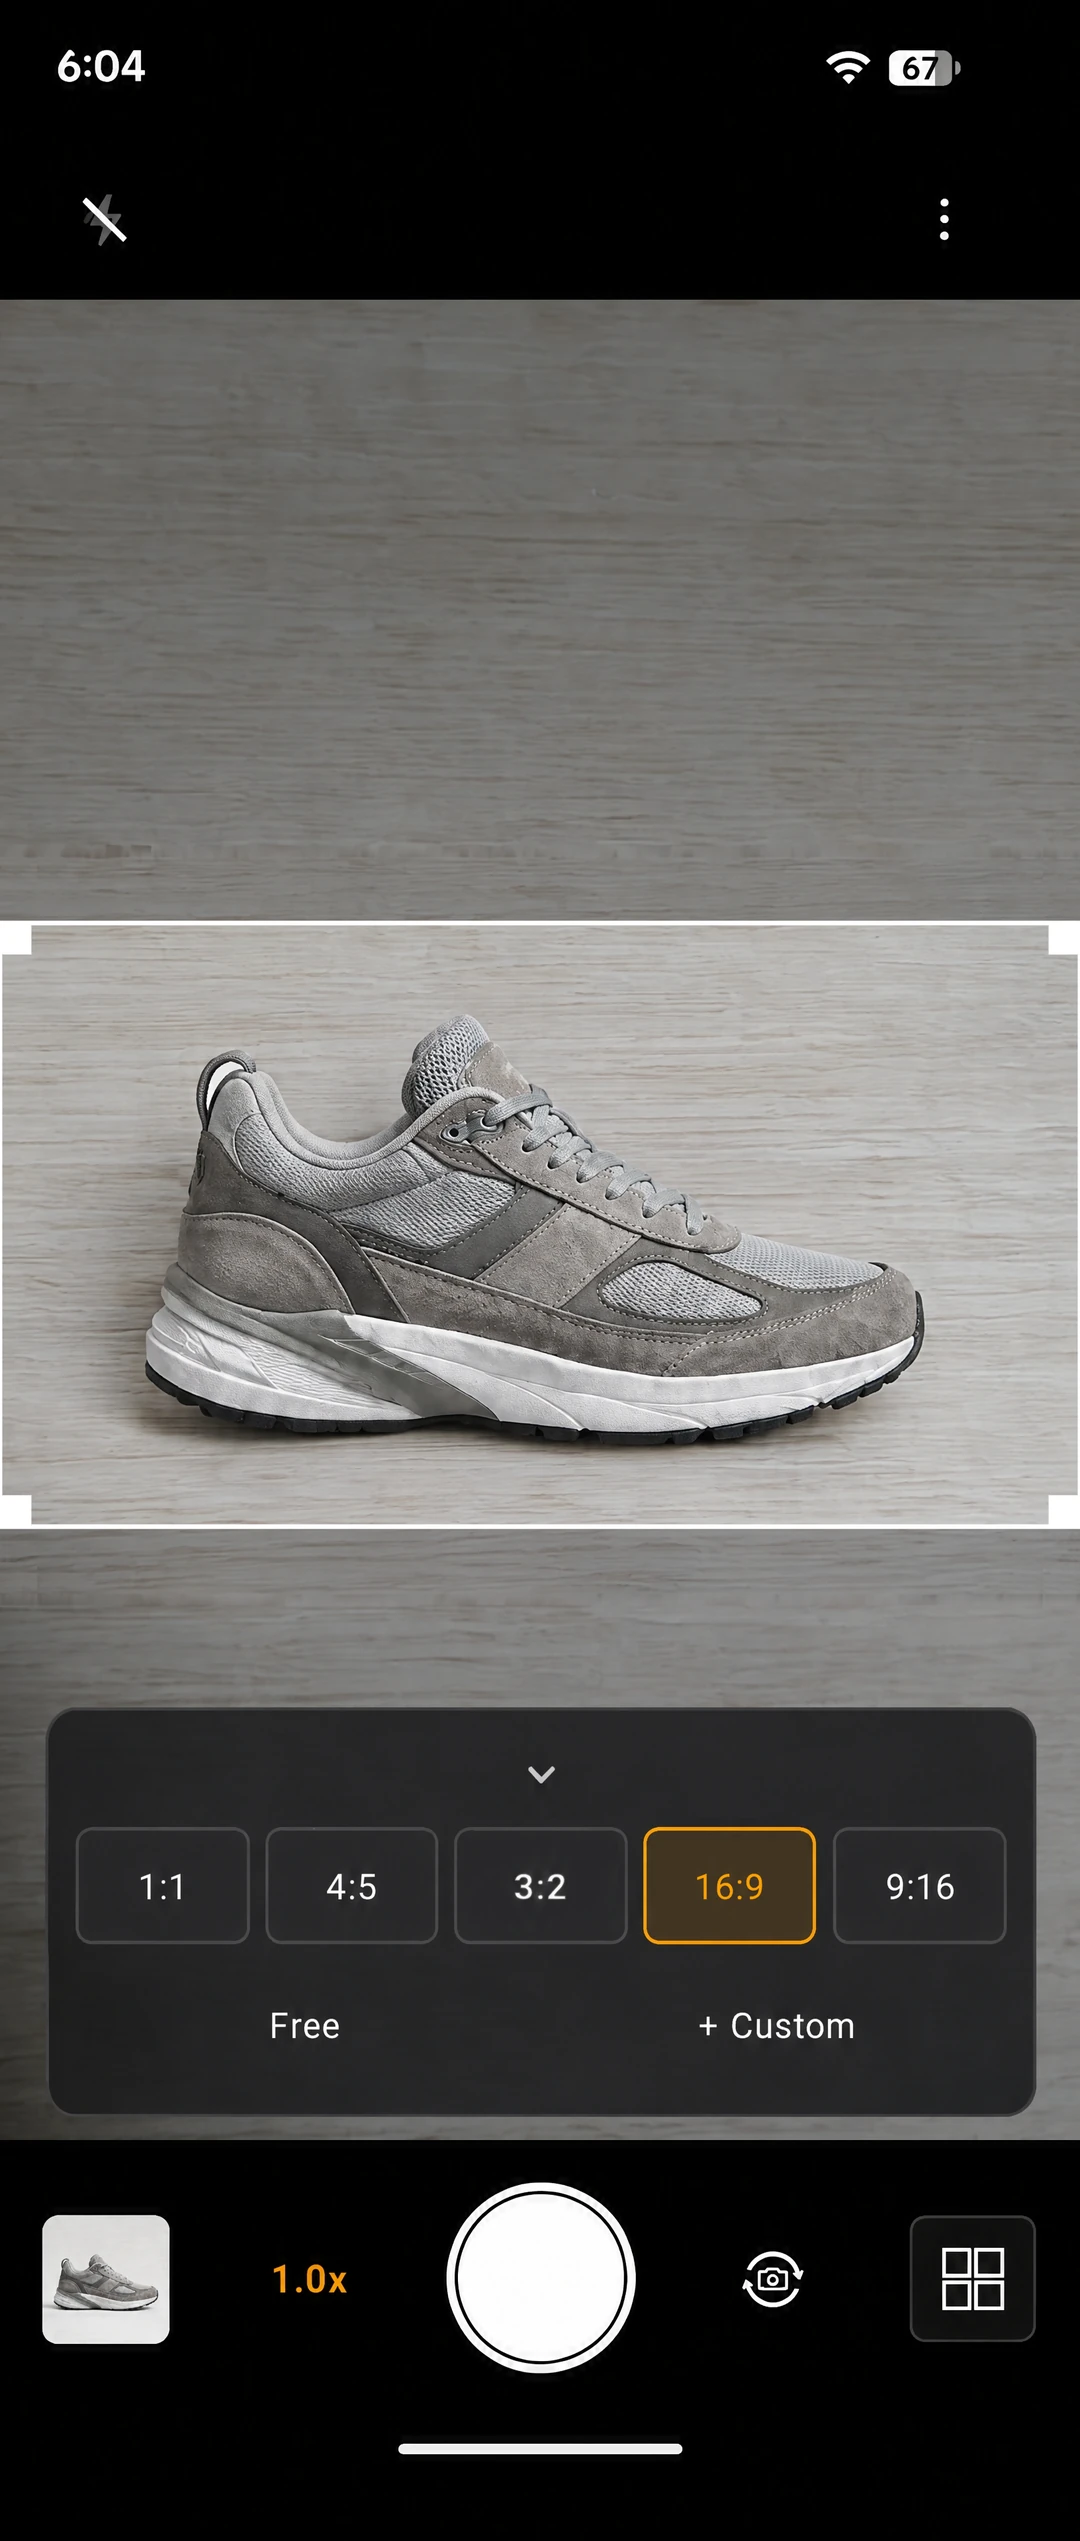
In the image above, the white frame marks the area that will be saved, with the subject inside it. The area outside the frame is shown dimmed, so the boundary of what will be kept is visible as is. Compose inside the frame, press the shutter, and the photo comes out in exactly that shape.
The ratio choices sit along the bottom of the camera screen. That row looks like this.
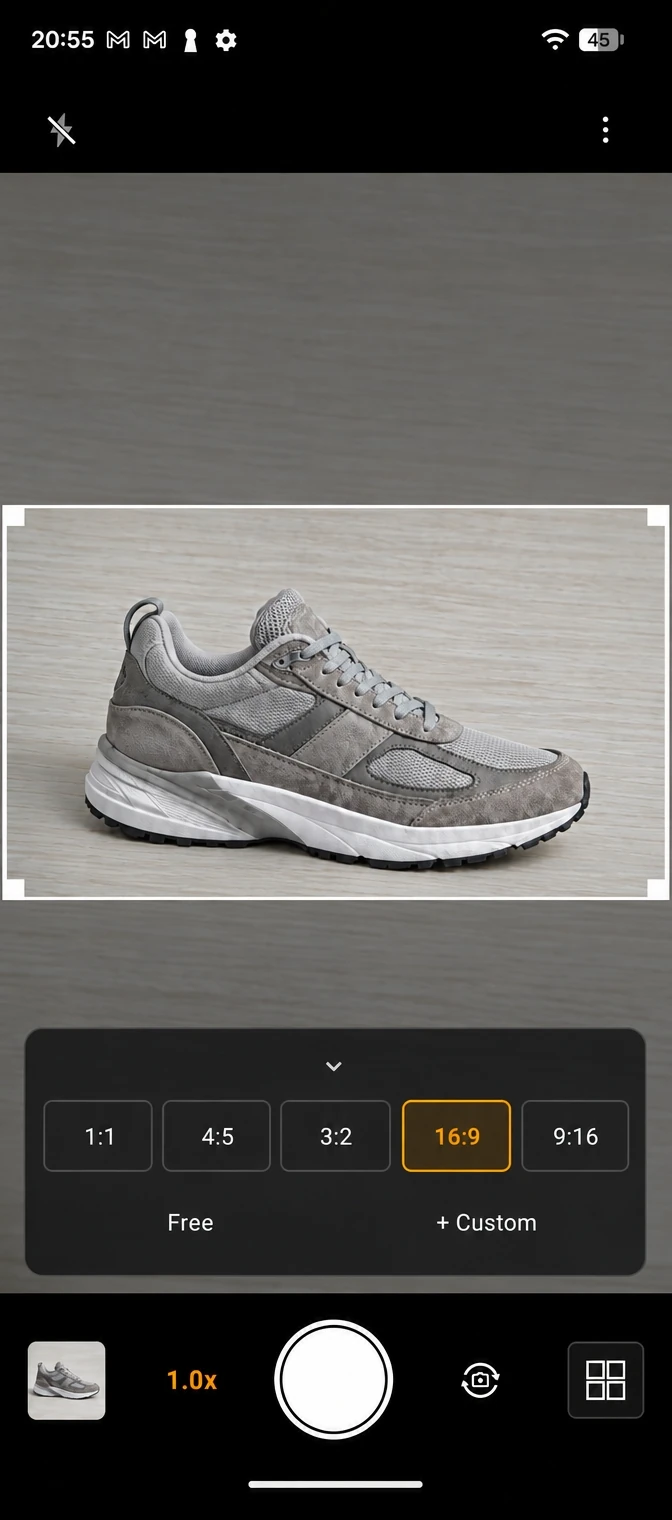
The image above shows the ratio selection. The five standard ratios sit in a row, and the selected one is shown highlighted. Pick one of the ratios in the row and the frame changes to that shape. Switching shapes takes a single tap, inside the flow of shooting.
Below the row, the entrances to Free and Custom are also visible. Those two are covered in a later section.
Only what is inside the frame is saved
When you press the shutter, only the inside of the frame is saved. Whatever was visible outside it does not remain in the photo. A saved photo looks like this.
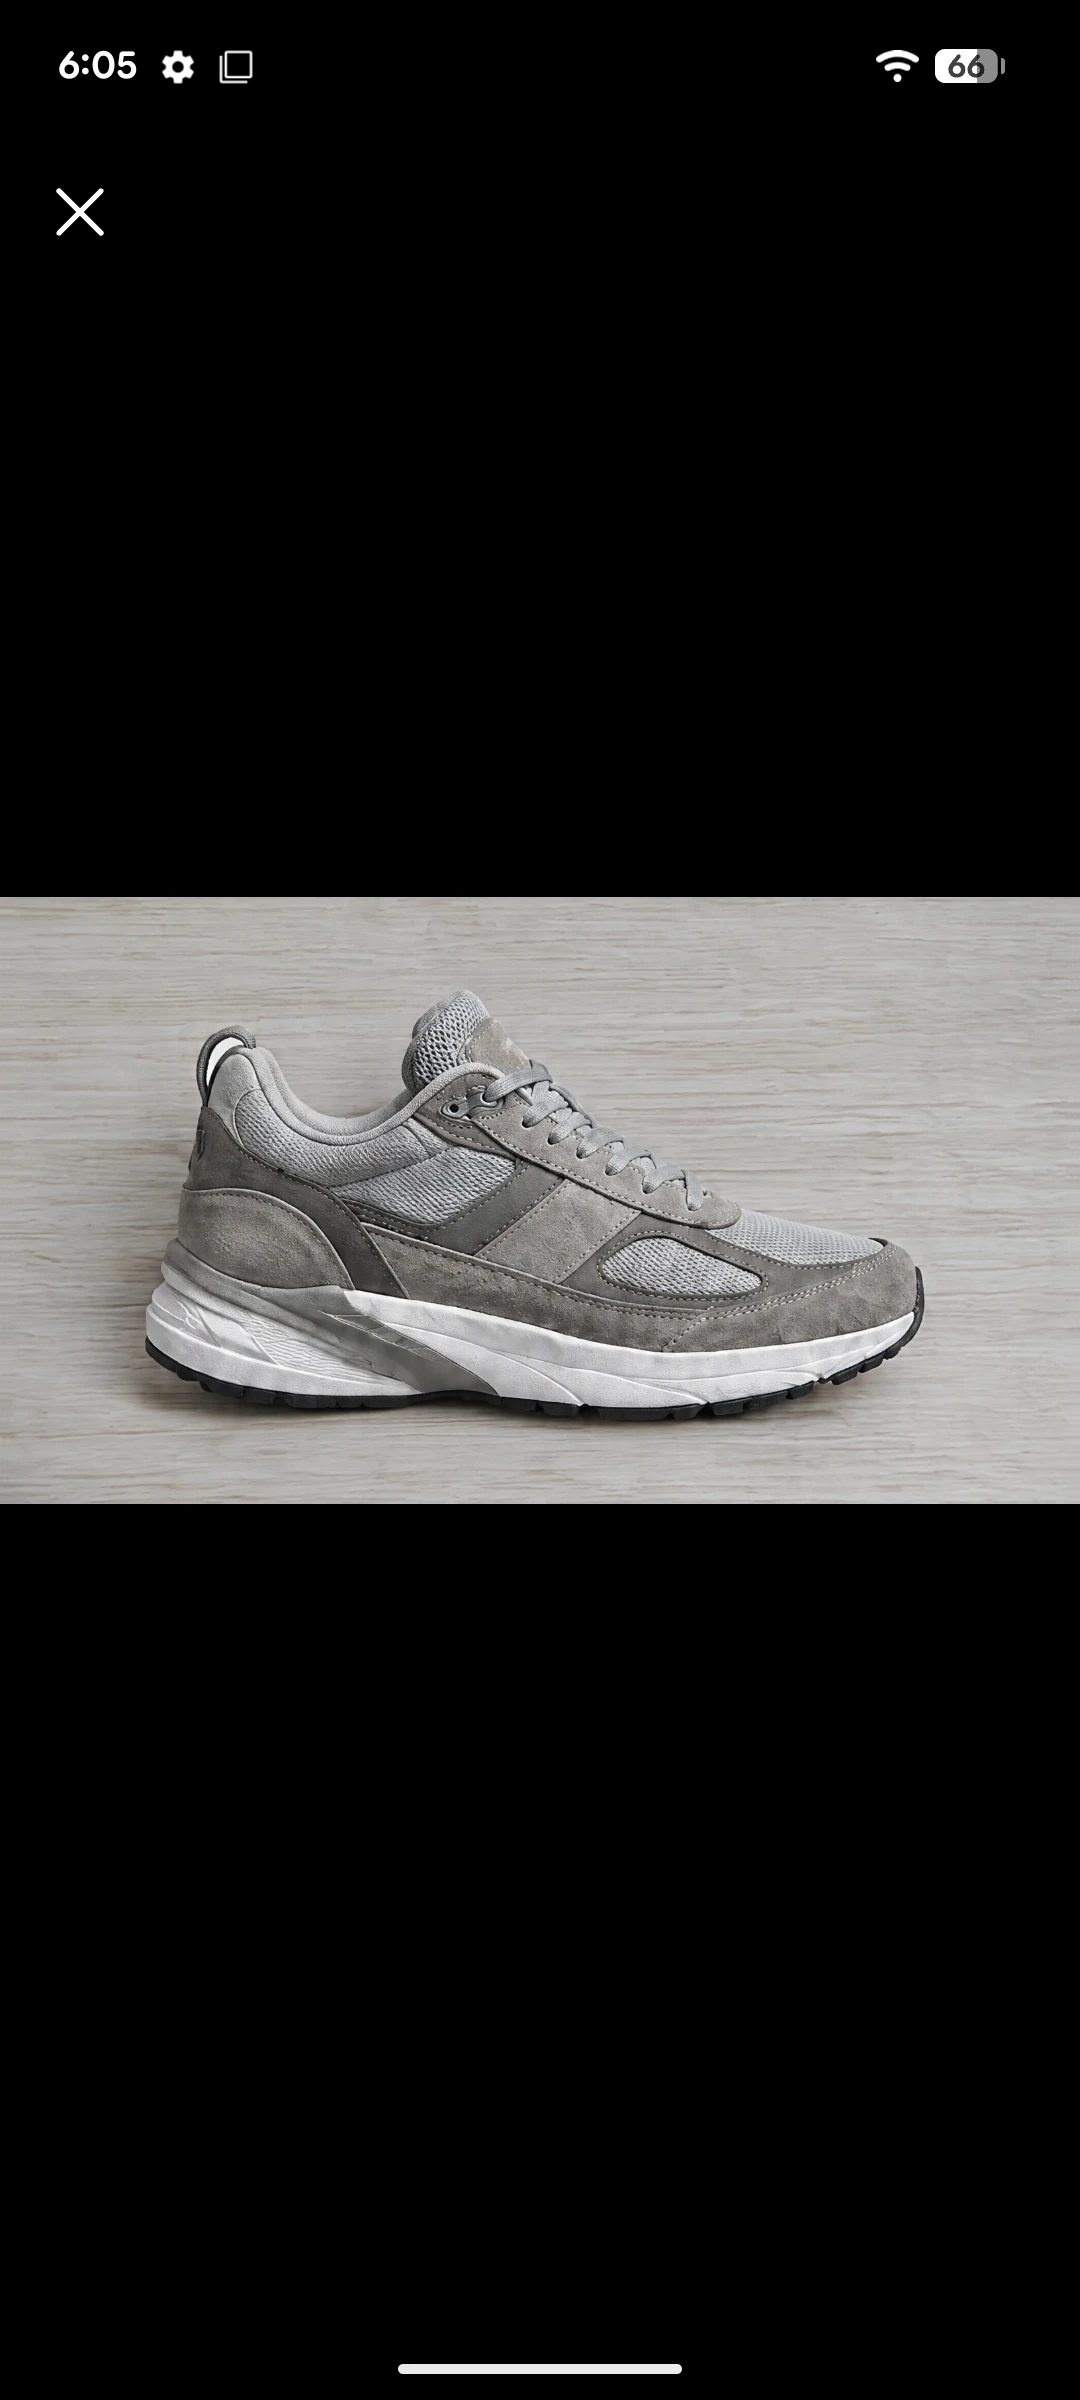
The image above is a saved photo, shown on its own in the center of a black background. Its shape is exactly the shape of the frame you saw while shooting.
There is a measurement behind that "exactly." While making an Encadra intro video, the white frame on the camera screen and the saved photo were compared in 1080×2400 material. The white frame measured 608 pixels tall and the saved photo 604 pixels, a difference of 4 pixels. The shape you see in the frame becoming the shape of the saved result holds up at the pixel level.
What you can do for free
The standard ratios are five: 1:1, 4:5, 3:2, 16:9, and 9:16. Those five, normal shooting, and saving to your photo library are free.
Encadra has no user account, and it shows no ads. Open the app, pick a ratio, and shoot. A wide ratio such as 16:9 can be picked without turning the phone, too. For shooting wide while holding the phone upright, see the article on shooting wide in a portrait grip .
Frames, the finishing borders applied to a photo, are also on the free side. The next section covers them together with the Pro boundary.
What Pro adds
Shapes beyond the five standard ratios, and the more advanced ways of shooting, open up with the one-time Lifetime Pro purchase. It is not a subscription with recurring billing.
Custom lets you enter any width and height from 1 to 99 and make your own ratio. You can name it and save it, and changing the contents of Pinned, the row of ratios you keep at hand, is also a Pro action. How ratios are made, and how duplicates are judged, is covered in the article on custom ratios .
Free removes the fixed aspect ratio, so the frame's width and height change independently. It suits places that no set ratio fits. Changing the width and height is the subject of the article on the free frame .
Sequence combines two to four shots into a single photo, using five fixed templates. A set of photos meant to be seen together becomes one photo at the moment of shooting. The templates and retakes are covered in the article on series photos .
The finishing frame and the watermark sit on opposite sides of this boundary. The frame's three types and six colors are free; choosing them is covered in the article on frames . Burning a name, date, or logo into the photo with a watermark is Pro; its settings are covered in the article on watermarks .
Notes on deciding before you shoot
Turning the device does not swap the selected ratio on its own. Pick a wide ratio and rotate the phone, and the frame keeps its shape. When you want the ratio flipped, such as 8:5 to 5:8, you use the explicit swap action. The orientation a photo is saved in is itself the subject of the article on as-shot orientation .
The frame is fixed at the center of the screen and does not move. Its size can change symmetrically from the corners, but you cannot slide the frame to shift a composition. To shift it, move the camera or the subject instead.
When you reopen the app, the ratio selection starts from 3:2. Even when you plan to shoot in the same shape as last time, checking the ratio first is the small habit of this way of shooting.
And there is no editing inside Encadra for cropping a saved photo afterward. The app concentrates on shooting and does not handle post-save editing. The shape is decided before you shoot; that is the premise of this app.
The full picture is on the Encadra page . The shape you set in the frame before you shoot becomes the photo as is. No cropping after the shot. That is how Encadra shoots.