When you want a photo finished with a frame on it, the frame usually comes after the shot. You open an editing app, pick each photo one by one, add a frame, and save it again. The photos you most want to hand over finished, on the spot — for a social post or a listing — are exactly the ones this extra step clings to.
Encadra's frames reverse that order. Choose a frame on the shooting screen before the shutter, and when you take the photo it is saved with the frame as part of it. The "frame" in this article is the finishing frame on the photo. It is a different thing from the shooting frame that decides the saved area, and the two are kept apart in the wording below.
Adding it later leaves work for every photo
Adding a frame later in an editing app repeats the same steps for every photo: select it, apply the frame, save it again. Depending on how the frame is added, it can also end up outside the photo, so the saved size and ratio change from the original.
Even a photo that was meant to be handed over as soon as it was taken is not finished until that work is done. Choose the frame beforehand, and putting it on becomes part of the shooting itself.
Three kinds of frame, chosen on the shooting screen
Frames are chosen in the panel that opens from the top of the shooting screen. There are four choices, including No frame, and three of them actually put a frame on the photo: Border, Instant, and Bottom band. Choosing a kind brings up the color choices beneath it; colors are the next section's subject.
Border surrounds the photo on all four sides. A shooting screen with Border chosen looks like this.
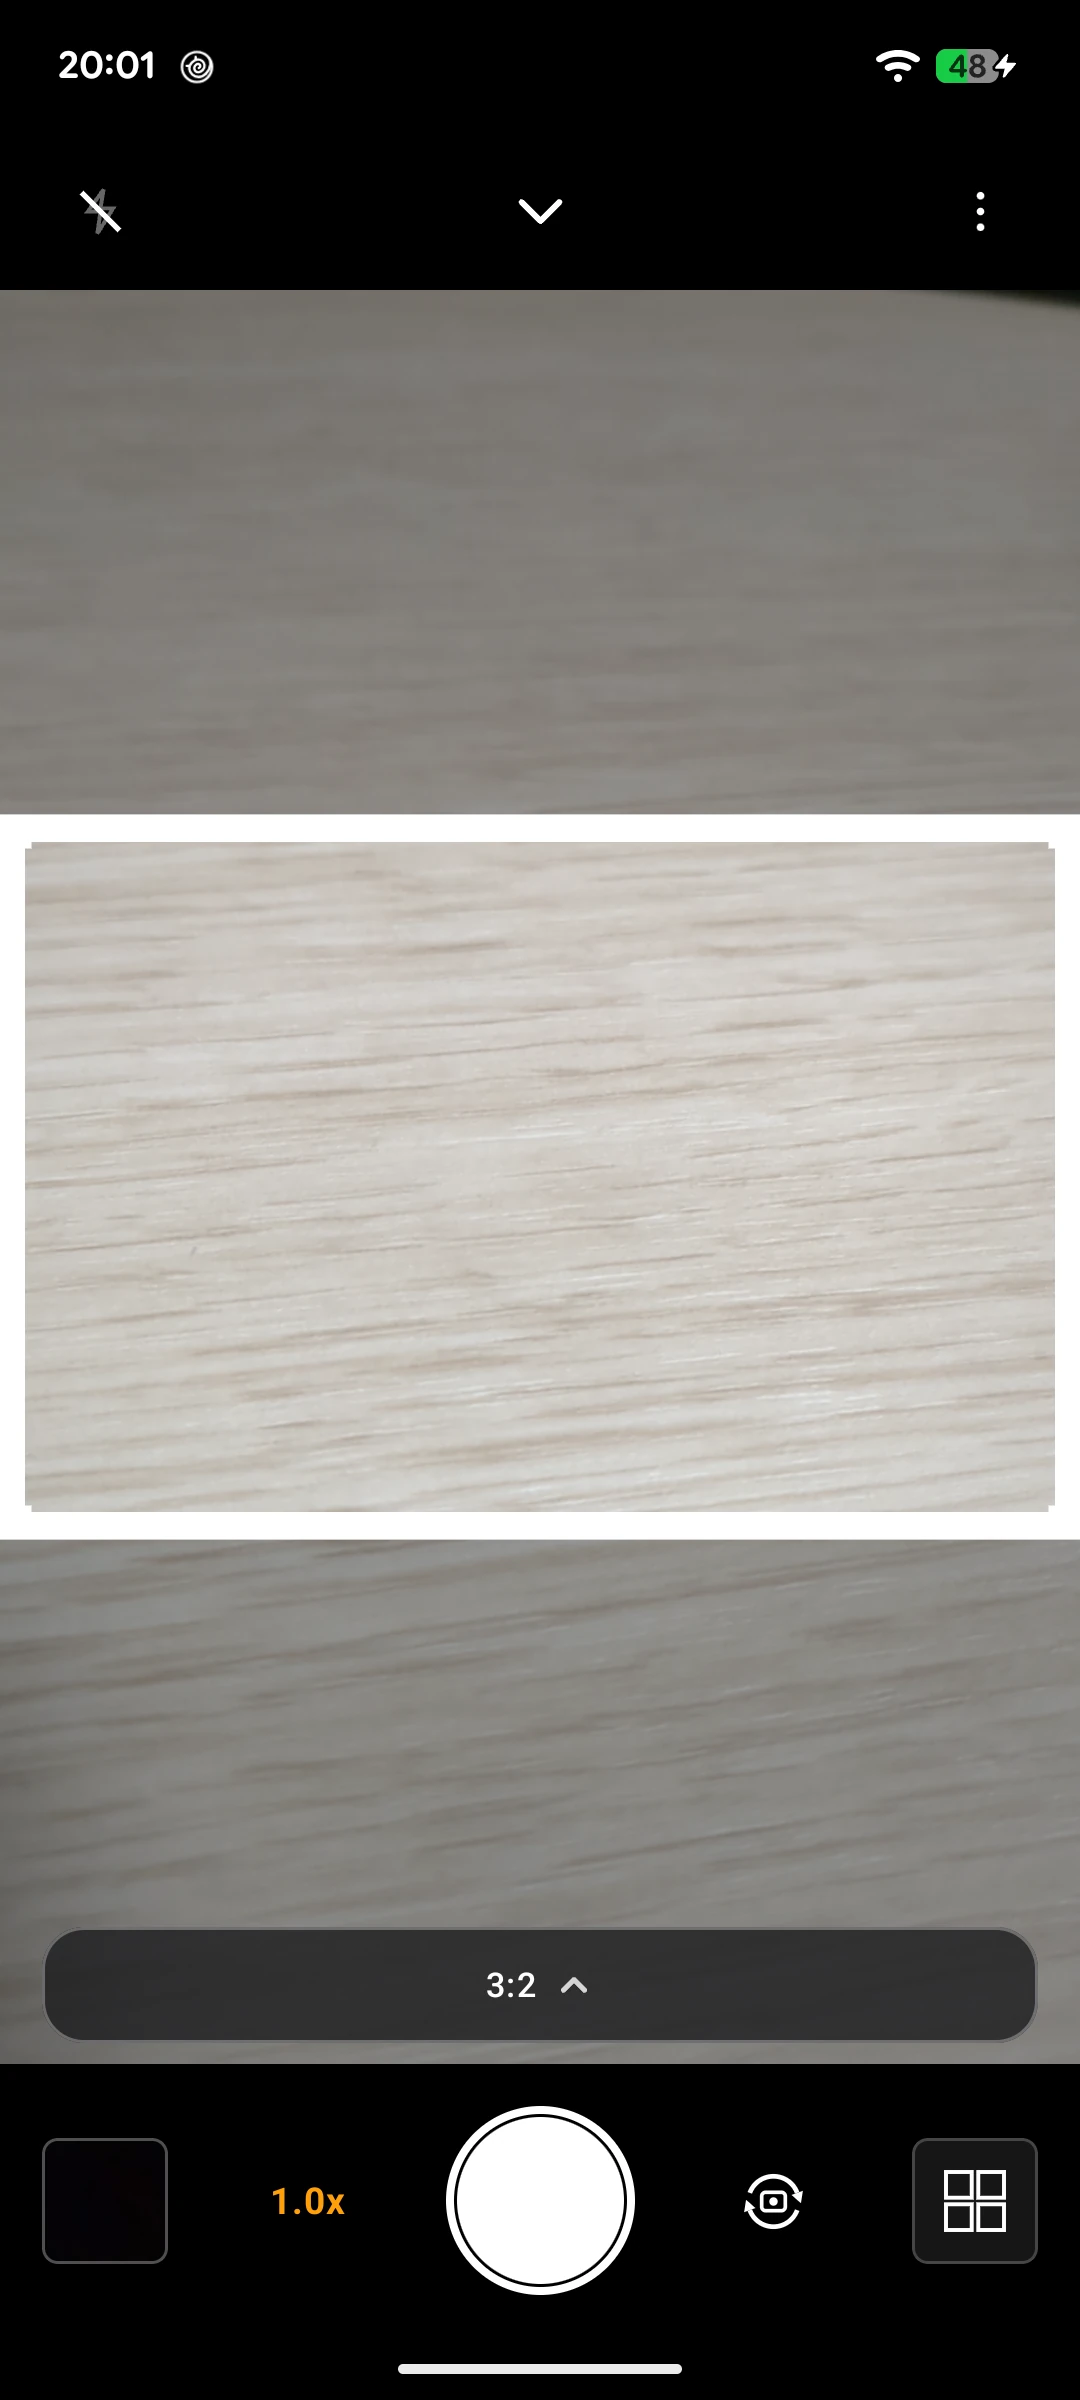
The band has the same thickness on every side: 3.5% of the saved photo's short side. The frame is drawn inside the photo, so the edges of the picture give way to the band's color. The shooting screen shows it exactly that way.
Instant also surrounds the photo, but takes a much wider strip at the bottom. In the app, this kind is labelled "Polaroid".
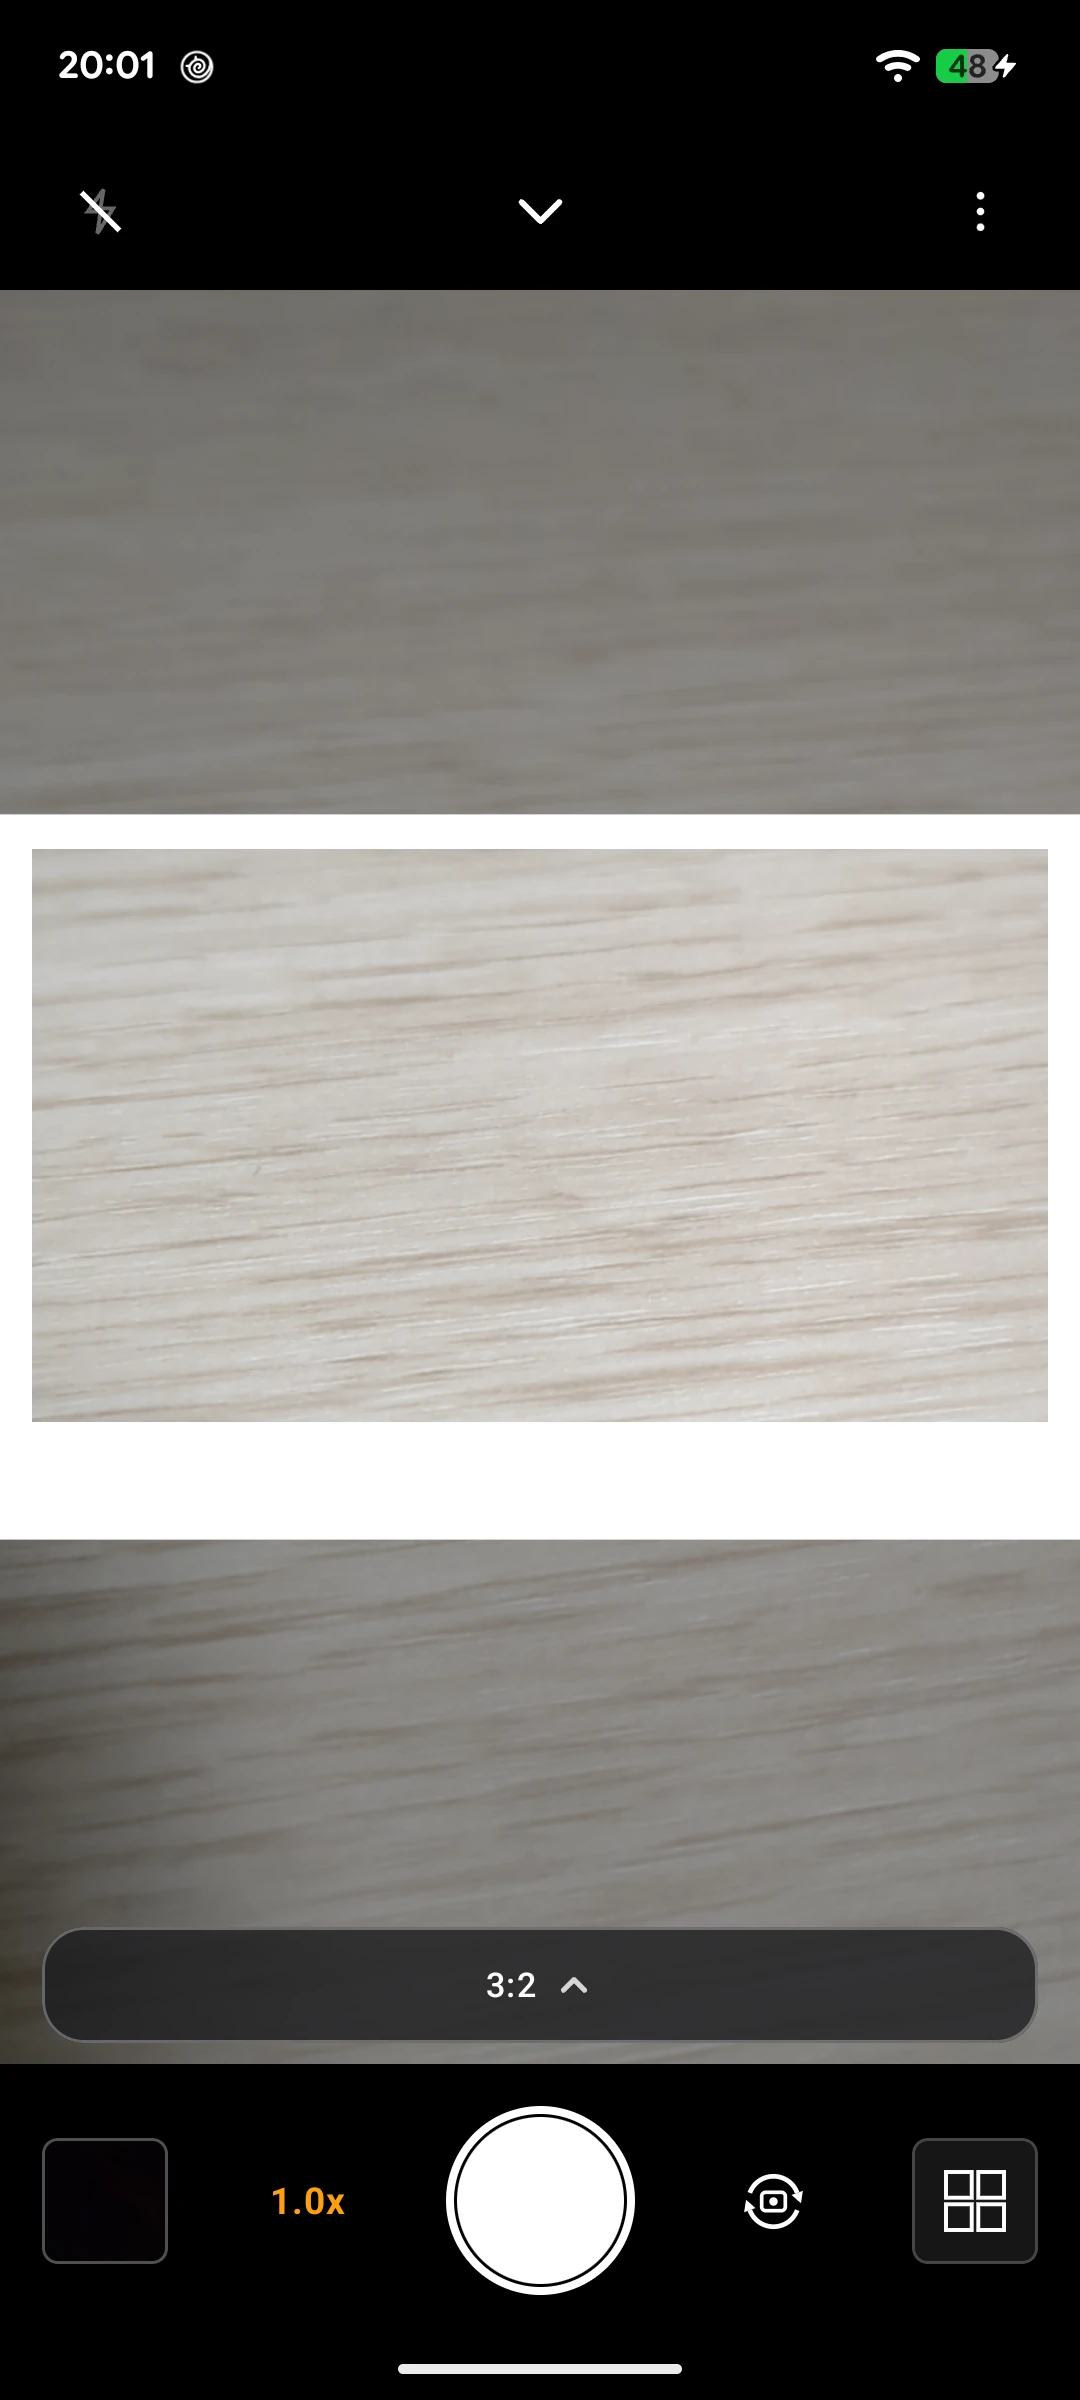
Its sides are 4.5% of the short side, and the bottom is 16%. The wide strip along the bottom is what gives it the look of an instant photo print.
Bottom band puts a strip along the bottom of the photo, and nowhere else.
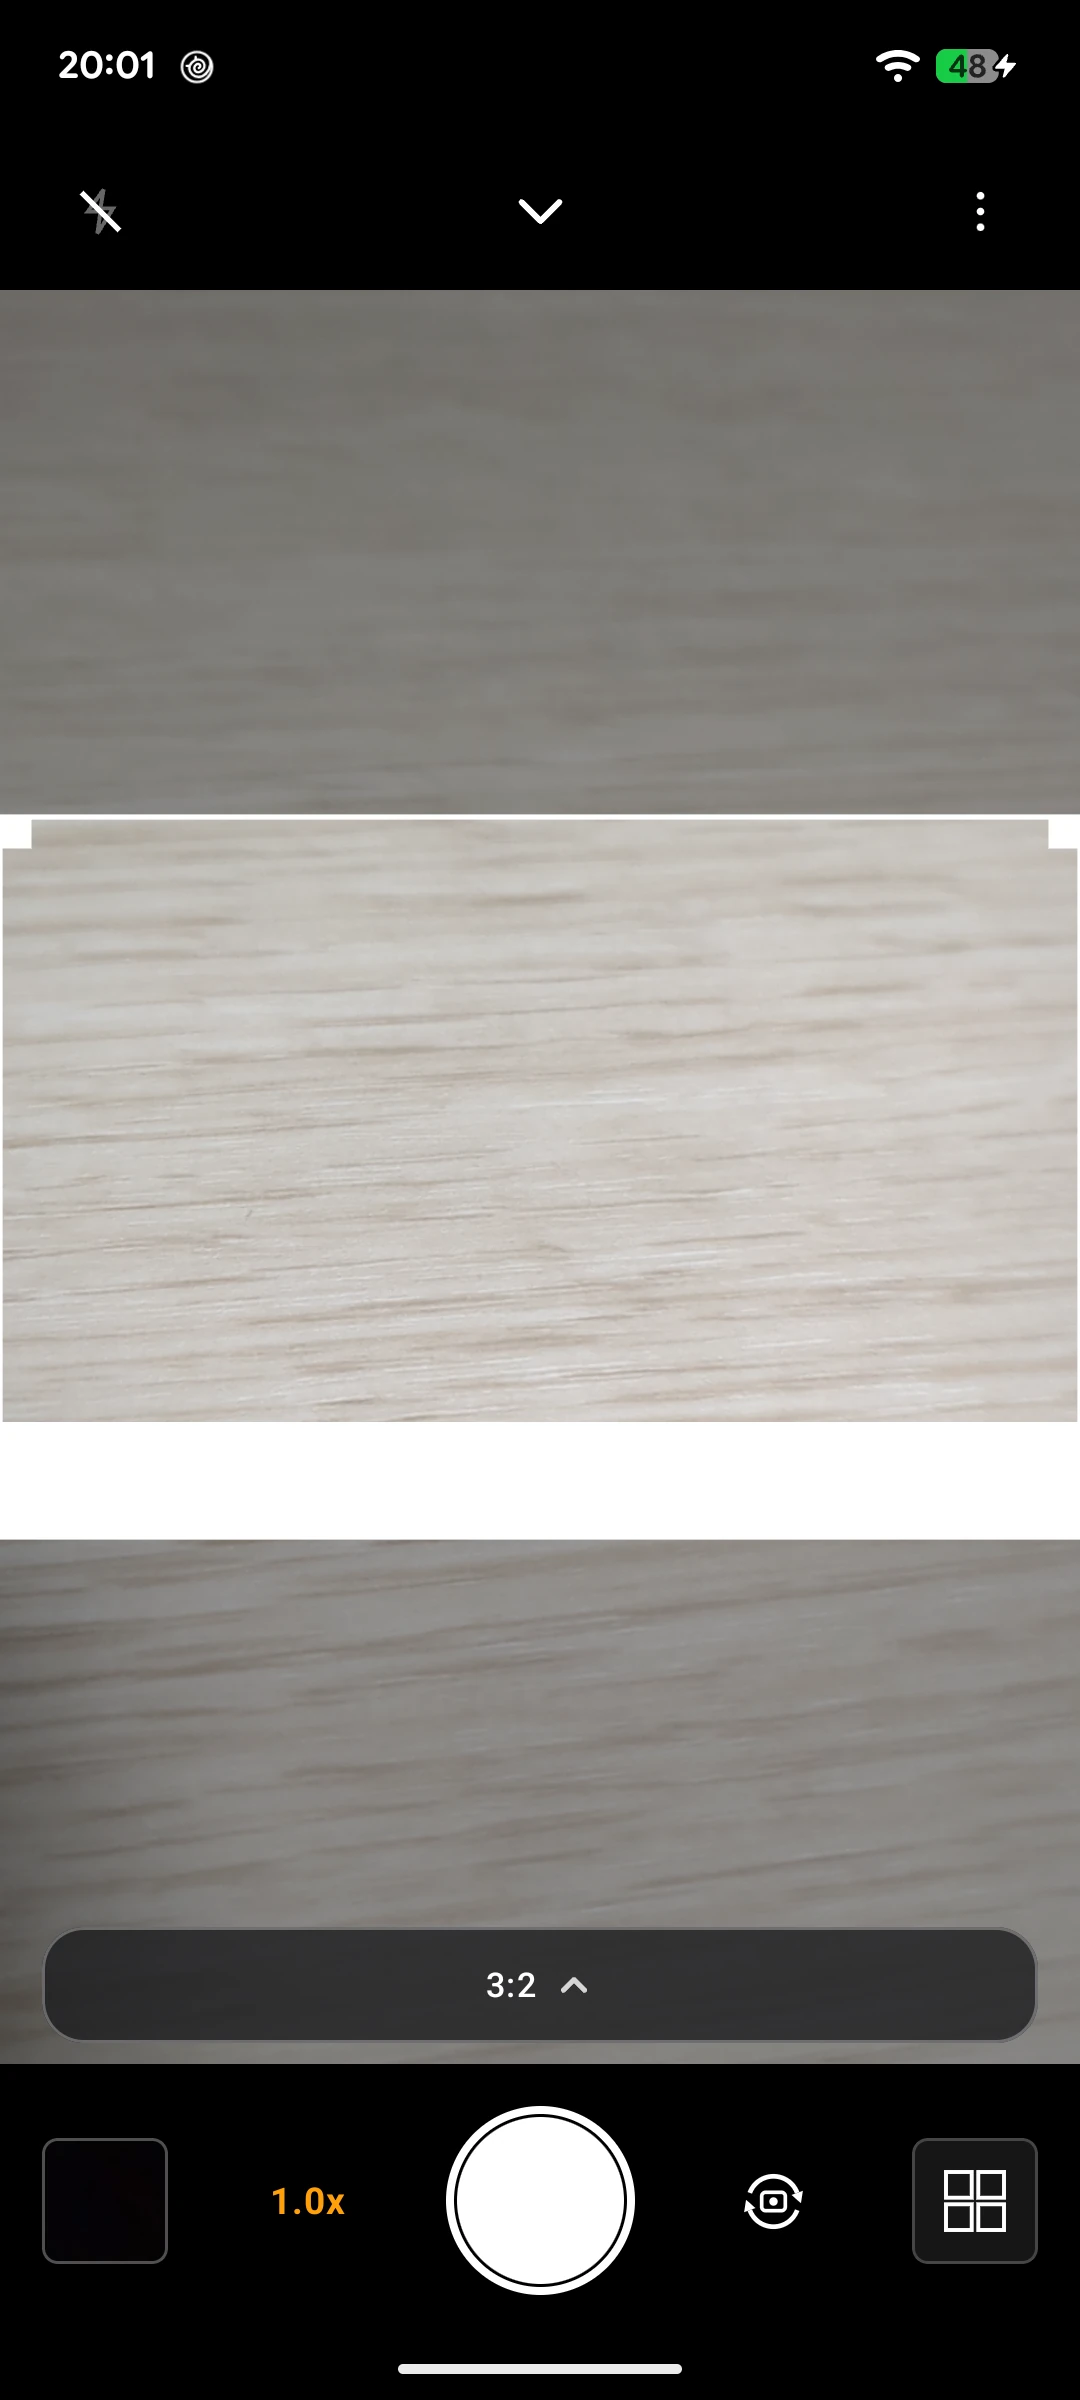
The strip is 16% of the short side, the same width as the bottom of Instant. Unlike the other two, nothing overlaps the top or the sides of the photo.
The default is No frame. When you do not want a frame, you simply shoot as you are.
Six colors, from white to black
Once a kind is chosen, six colors appear: White, Ivory, Gray, Slate, Charcoal, and Black. They run from light to dark, and the color you pick becomes the color of the band.
The color combines with any of the three kinds. Every screenshot in this article uses white. How another color looks can be checked right on the shooting screen, because the frame is shown there exactly as it will be saved.
The default color is white. The color, too, is decided before you shoot.
Your saved size and ratio stay the same
Putting a frame on does not change the size or the ratio of the saved photo. The frame is drawn inside the shooting frame (the saved area), not added outside the photo, so the photo is saved at the ratio you chose before shooting.
The frame you see on the shooting screen is also the frame in the saved photo. What the finder shows and what is saved do not drift apart.
A photo saved with its frame looks like this.
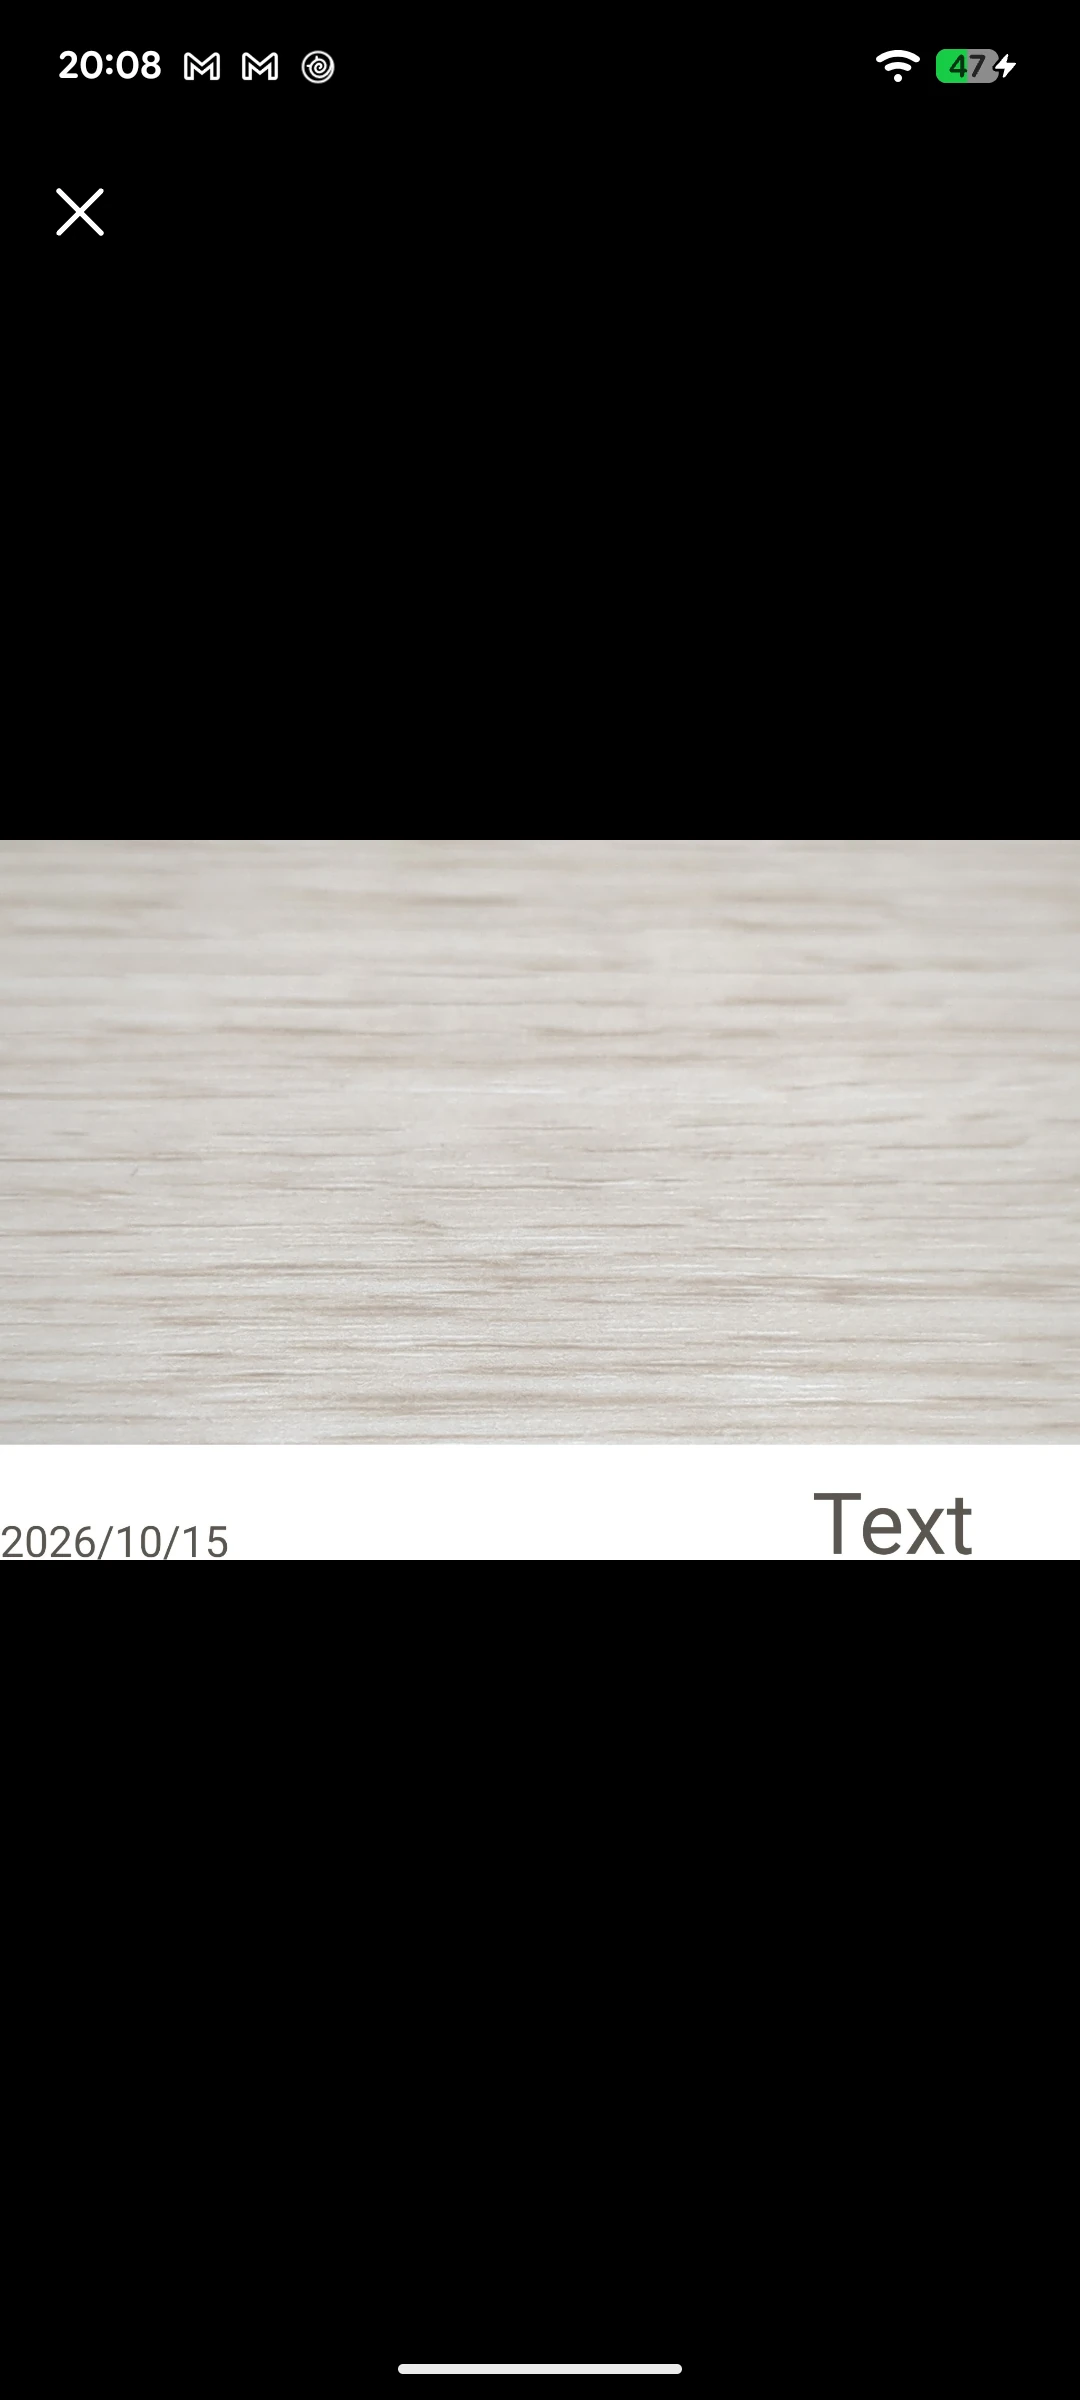
On a black background, only the saved photo is shown. It carries a white band along the bottom, and on the band there are a date and a line of text. That overlap is the next section's subject.
None of the shooting screen's buttons or displays appear in the saved photo.
A watermark can ride the bottom band
A watermark can be placed on top of the bottom band. A date and time, text such as a name, or a logo can sit on the band's color. The stacking order is photo, then frame, then watermark, so the text is never buried under the band.
A watermark also works on a photo with no frame at all. With a band, it rides the band; without one, it sits directly on the photo.
The detailed settings for watermarks — position, size, opacity — belong to the article devoted to watermarks. Here it is enough that the band and the watermark are separate layers that can be combined.
Frames are free; watermarks are Pro
Both the kind and the color of a frame are free. There is no lock on the choice: you pick one and shoot.
What is Pro is the watermark. Putting text such as a name, a date and time, or a logo on a photo requires Lifetime Pro. If you want a watermark riding on a frame's band, only the watermark part is Pro.
Frames are added in regular shooting only. In Sequence shooting, no frame is added. Watermarks work in Sequence as well, so the two are handled differently in this respect.
A frame cannot be added to a photo after it has been saved. Encadra is a shoot-only app and does not edit saved photos. That is why the frame is something you choose before the shutter.
For the full picture of the app, see the Encadra page . A frame is not a decoration added afterward. You put it on before you shoot, and it is saved as part of the photo. That is what Encadra's frames are.