Christmas is the kind of event where the photo count jumps all at once. The tree, the cake, the gifts, the table. Even if you want the same frame on all of them, editing each photo one by one afterwards means the framing alone eats the whole event.
So this year I reversed the order. I made one frame before the day, set it in Encadra, and on the day I just shot. This article is the record of actually making a Christmas frame in the Frame Maker. The feature itself is explained in the custom frame article , and the step-by-step is in how to make a custom frame . This one stays with what it was like to make it.
First decision: do not fight the photos
Three things were decided before making anything. The ratio would be 1:1, matching the photos. The centre would stay empty, with motifs only around the edge. And the colours would be kept few.
Christmas subjects are already colourful: the green of the tree, the red of the cake, the gold of the lights. If the frame is just as colourful, frame and photo melt into each other and look busy. The rule while making it was to match only the mood, and let either the frame or the photo carry the decoration, not both.
Made in the Frame Maker
The process is three steps: pick a taste, enter a theme, generate and export.
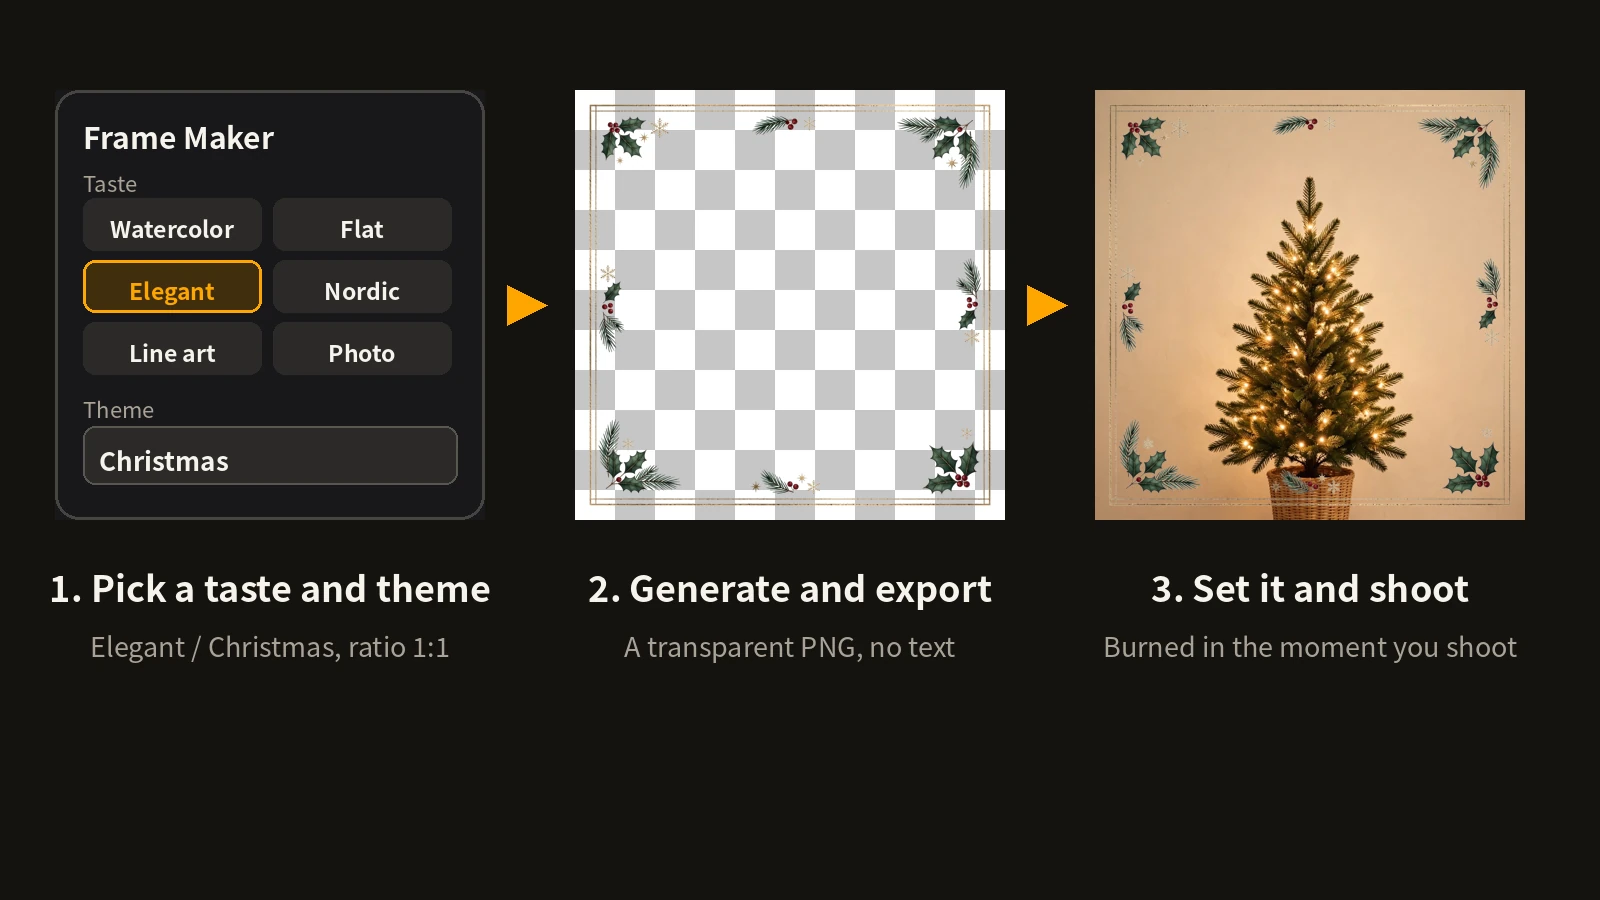
From the twelve tastes, I chose Elegant. Watercolor and Pop were candidates too, but with subjects this colourful, a frame held back to thin gold lines, deep green and deep red lets the photos stand out. The theme field got "Christmas", and the request specified thin gold lines, holly and pine leaves, small deep-red berries, stars and snowflakes placed sparsely around the edge, and no text.
Here is the exported frame.
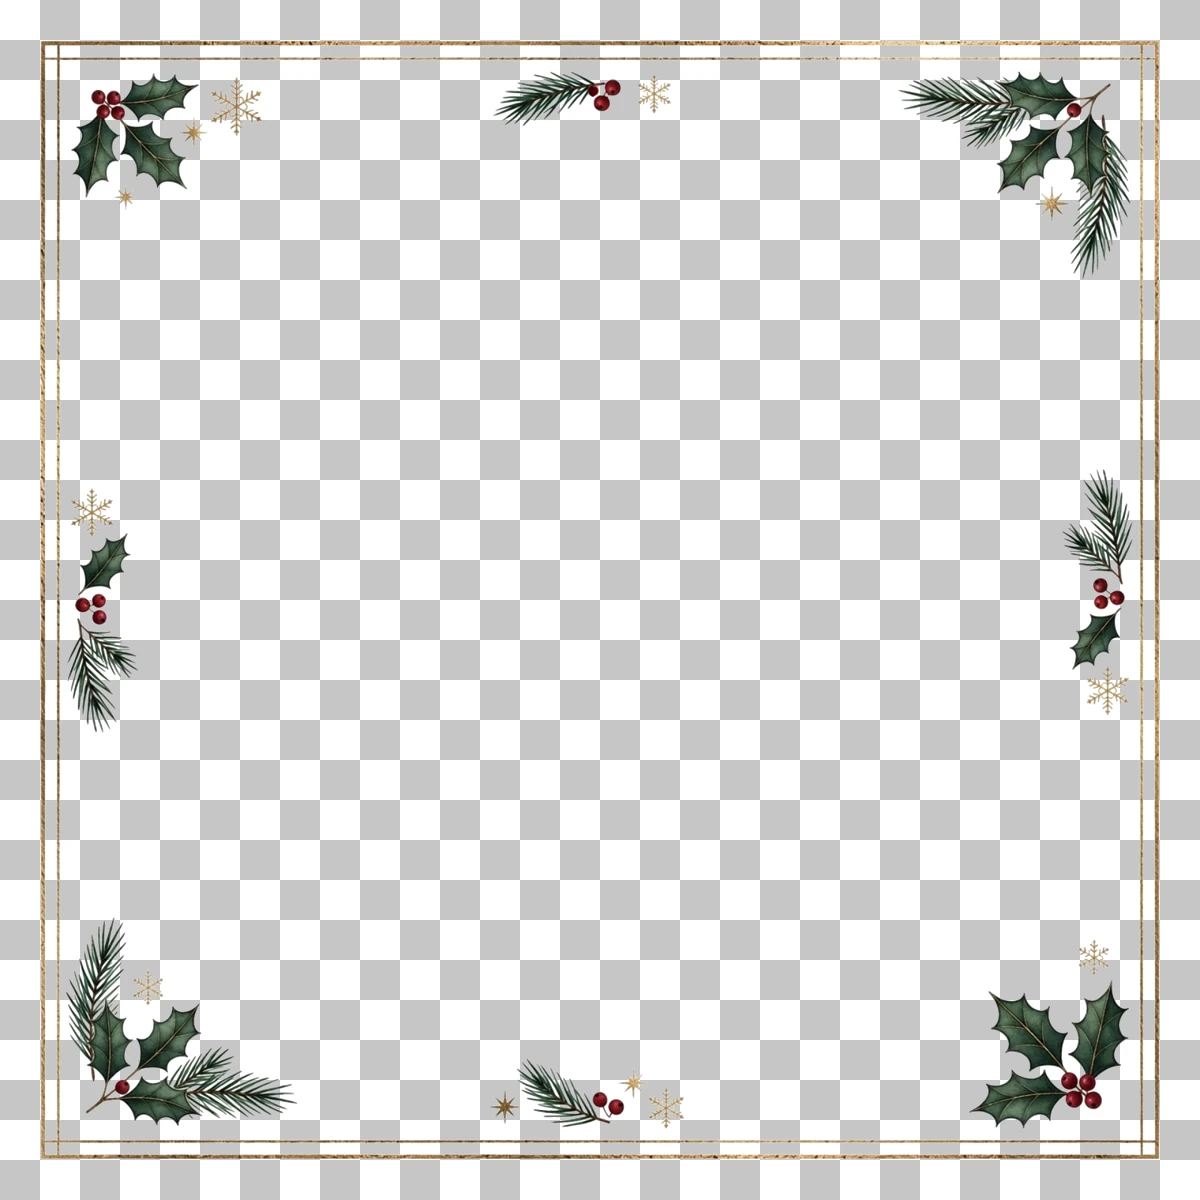
A double gold line, with holly and berries, pine leaves, stars and snow kept inside the edge band. The centre is transparent, with nothing intruding. Measured, the central area was fully transparent, and the artwork covered only about 7% of the whole image. Far more restrained than expected, which keeps the photo as the main subject.
Set in Encadra
The exported transparent PNG goes into a frame slot on the shooting screen.
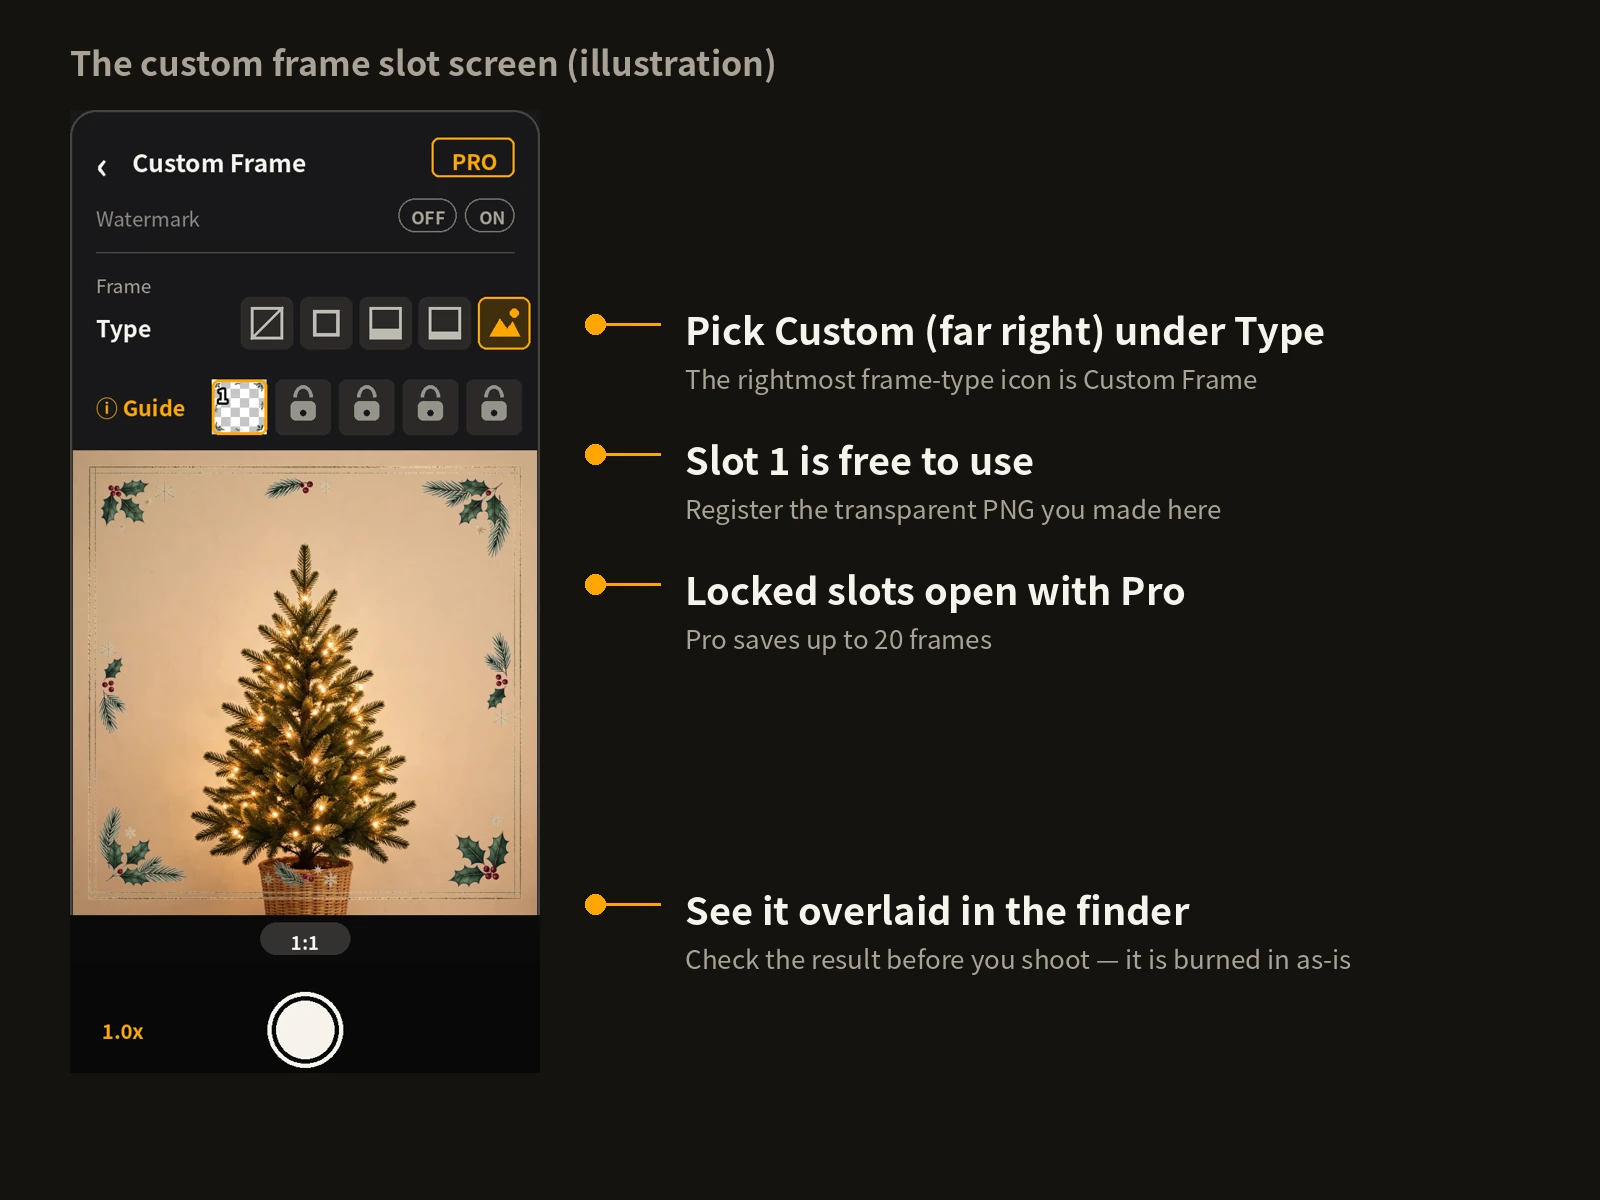
One slot is free, and the Christmas frame went into that slot. The registered image is copied into Encadra, so the frame stays even if you delete the original PNG from your device. The frame is also overlaid in the finder, so you can check the result before you shoot.
Then I just shot
Once it is set, you shoot as usual. The photos taken with the same frame came out like this.
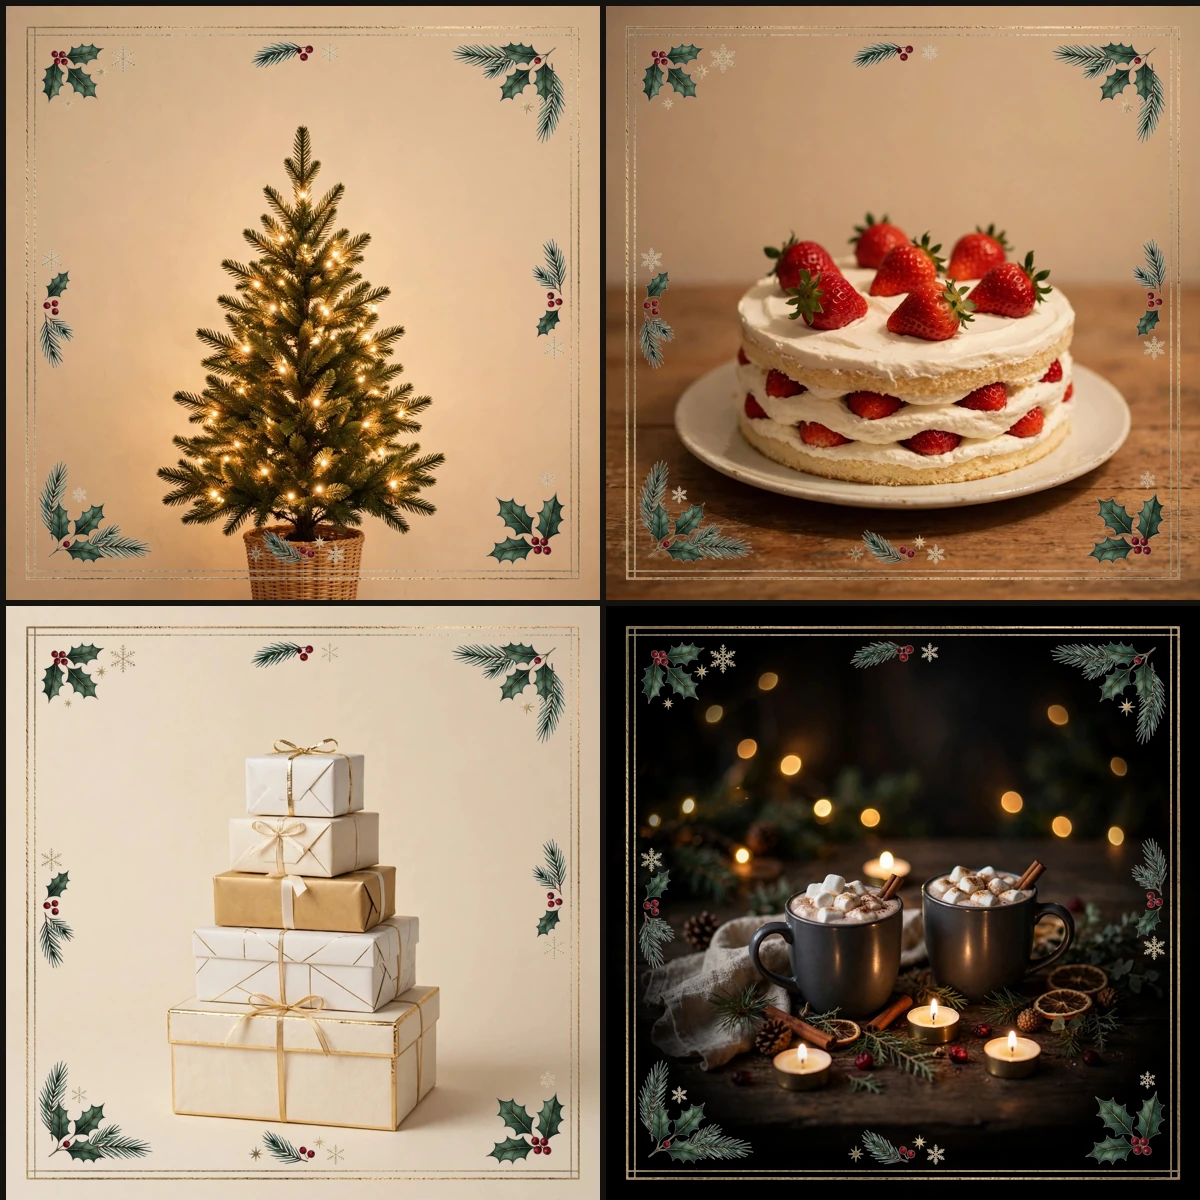
Note: This image simply places separately shot photos side by side. It is not a Sequence photo, which combines multiple shots into one image — custom frames are not available in Sequence.
The tree, the cake, the gifts, and the cocoa table. The frame's position and size stay the same whatever the subject, and the gold lines read on both bright and dark photos. The work of adding a frame afterwards does not happen, whether there are four photos or forty.
What I learned
The main lesson was not to be greedy with the frame. More motifs make it feel more like Christmas, but overlaid on a photo it quickly gets loud. Sparse, at the corners and edges, was the right amount once actually combined.
The other point is to decide the ratio first. A custom frame is fixed over the whole photo, so if the frame's ratio and the photo's ratio differ, the artwork is burned in mismatched. This time the photos were set to 1:1 before the frame was made.
Make it before, set it before. On the day, just shoot. That was how this Christmas frame was made. The full picture of the feature is on the Encadra page .